17 Easy Onigiri Recipes (No Nori Seaweed!)
Discover easy onigiri recipes without nori seaweed! In this recipe, I’ll share delicious rice ball variations, from classic fillings like salmon and wakame to unique and flavorful options!
For onigiri basics, check out Onigiri 101 (Beginner’s Guide).

While onigiri is traditionally wrapped in nori, this recipe keeps it simple without it. It’s perfect for little ones who might find nori tough to bite, or if you’re just not a fan of the black sheet. I’ll walk you through each filling and how to prepare it—let’s get started!
Featured Comment
From Christine: “Lovely to look at, convenient and very tasty. Thank you for sharing these recipes! It helps me not miss Japan so much… 🙂”
1. Wakame Seaweed Onigiri
This wakame onigiri is the easiest way to make onigiri. Just buy wakame seaweed onigiri seasoning at a grocery store and mix it into your rice. When I’m in a hurry, this seasoning really helps me out.

2. Edamame Onigiri
This onigiri is visually appealing! Edamame brings a nice green color to your onigiri. Adding shio kombu, katsuobushi, or cheese is a great idea for extra savory flavor!

3. Corn Onigiri
The best onigiri for summer! Mix in some seasonal corn for an extra crunchy texture. The sweetness of corn and rice brings a delicious flavor you won’t stop eating!

4. Shio Kombu Onigiri
Shio kombu seaweed is a savory ingredient that I use for many dishes. It has a rich flavor, perfect for adding some depth to your onigiri!

5. Furikake Seasoning Onigiri
This furikake onigiri is a super easy way to make onigiri! You can select your favorite flavor of furikake (rice seasoning) and mix it into your rice!

6. Salmon Onigiri
Salmon flakes and sesame seeds are other classic ingredients for onigiri. It’s delicious, and many people enjoy salmon onigiri.

7. Scrambled Egg Onigiri
Scrambled egg and Japanese Kewpie mayonnaise are a tasty combination for white rice. Our kids love this onigiri. You can also add ketchup instead of mayonnaise. By the way, if you enjoy seasoned eggs, you might also like this egg onigiri!

8. Cheese Onigiri
The slightly salty cheese is a great addition to plain, simple steamed rice. The shiso leaves add a refreshing fragrance to the onigiri. You can substitute shiso with parsley or scallions.

9. Katsuobushi Onigiri
If you are looking for savory fillings, this Katsuobushi (Bonito flakes) is a good choice. It’s one of the popular fillings that brings you a rich, umami flavor.

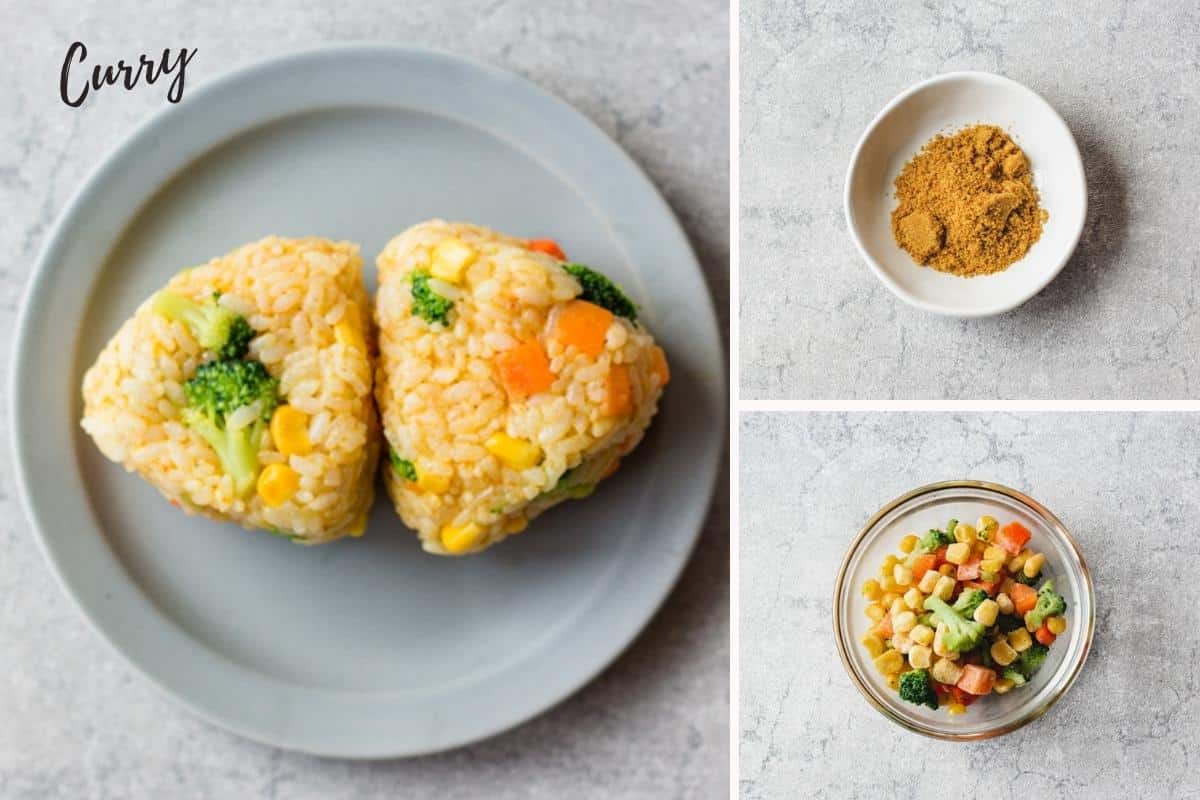
10. Curry Onigiri
You already know that curry and rice are a perfect match. It’s also delicious as a rice ball! Enjoy curry-flavored onigiri with lots of vegetables!
11. Takuan & Umeboshi Onigiri
This onigiri is made with pickles. Takuan (pickled daikon) goes well with plain white rice. The sourness of the umeboshi (pickled plums) adds a deliciousness that you won’t get tired of eating. It would be great to add black sesame seeds as well.

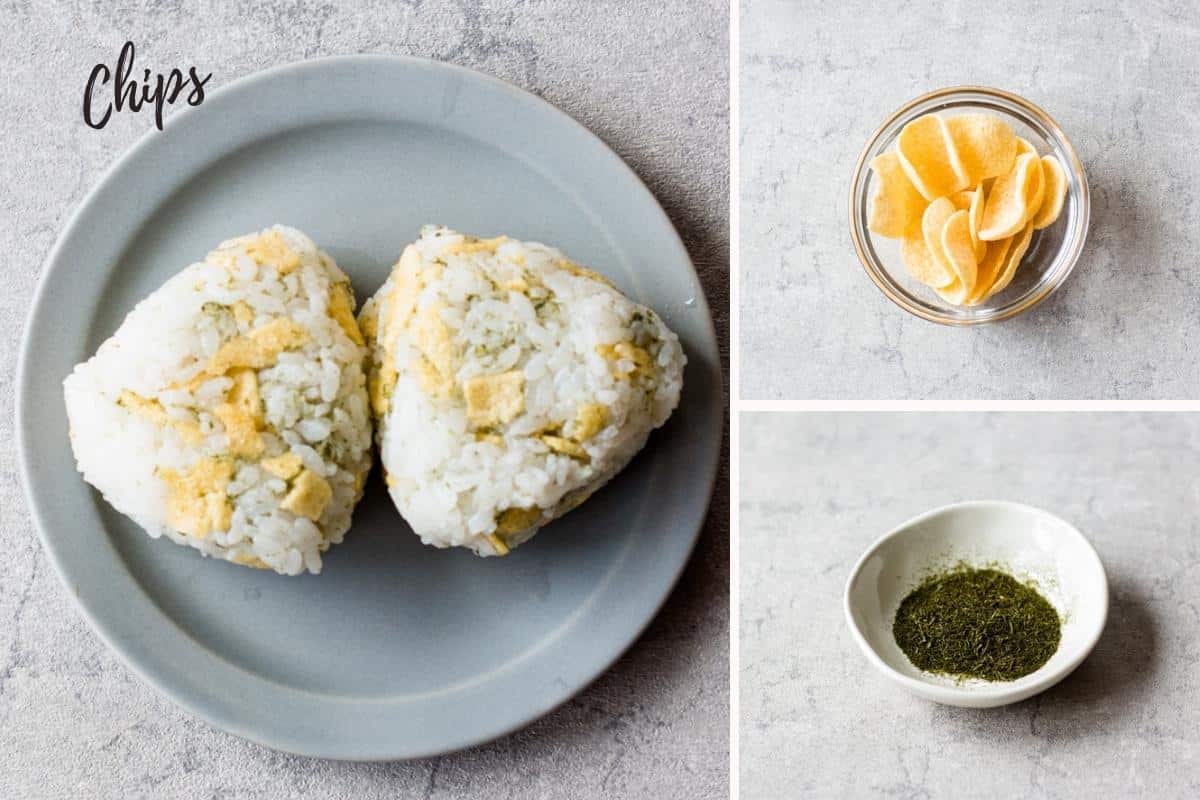
12. Potato Chips Onigiri
Potato chips are not common for onigiri, but they add a nice crunchy texture and are the perfect addition to your rice balls! Pick your favorite flavor!
13. Ochazuke Onigiri
Ochazuke mix is also an excellent seasoning for onigiri! The green tea powder in it adds a savory flavor.

14. Hijiki Seaweed Salad Onigiri
Hijiki seaweed salad is a classic Japanese side dish, simmered with soy sauce, mirin, and dashi. The rice soaks up the rich and savory flavor of the umami, making it a gentle-tasting onigiri.

15. Dried Shrimp Onigiri
Dried shrimp is rich in minerals. The bright pink color and fragrant aroma stimulate your appetite. Add salt to your liking.

16. Anchovy Onigiri
This onigiri is full of flavor with anchovies and seasoned nori seaweed. The seaweed provides a delicious crunch, while the anchovies give it some extra saltiness you can’t resist! It would be nice to add some green onions as well.

17. Simmered Koyadofu Onigiri
Koya dofu is frozen-dried tofu and is excellent for Japanese simmering dishes. The sweet and salty flavor enhances the simple taste of your white rice. You can replace koya dofu with tofu or ground meat.

Shio Onigiri
This shio onigiri, or plain salt onigiri, is the simplest one made with salt, no filling, and no nori sheet! If you don’t feel like preparing any fillings, try this shio onigiri!

Recipe Ingredients
You’ll need the following ingredients to make onigiri:

How To Make Onigiri without Nori: STEP BY STEP
Here are some quick visual instructions! For the video and all the detailed ingredients and instructions, go to the printable recipe card below.

Step 1
Mix rice with your chosen filling.

Step 2
Wet your hands, add a pinch of salt, and spread it on your palms.

Step 3
Place rice in your hand.

Step 4
Gently press with both hands to form a triangle.

There you go! Here are five onigiri variations for you! Which one is appealing to you? With these colorful rice balls, it would be fun to have an onigiri party (our kids love it).
How To Make Onigiri Using Plastic Wrap
Using plastic wrap is a quick and easy way to shape onigiri. Additionally, it’s safer, as holding rice with wet hands can increase the number of germs over time.

Step 1
Place rice on plastic wrap and sprinkle with a pinch of salt.

Step 2
Wrap the rice.

Step 3
Gently press with your palms to shape it into a triangle.

Done
That’s it!
If any of these situations sound familiar, shaping rice with plastic wrap is a great option:
Onigiri Molds
If you find it challenging to form onigiri by hand, don’t worry! You can use a tool like an onigiri mold or onigiri press to make the process easier and more consistent.

Storage
If you don’t eat the onigiri immediately, wrap each with plastic and store them in an airtight container.

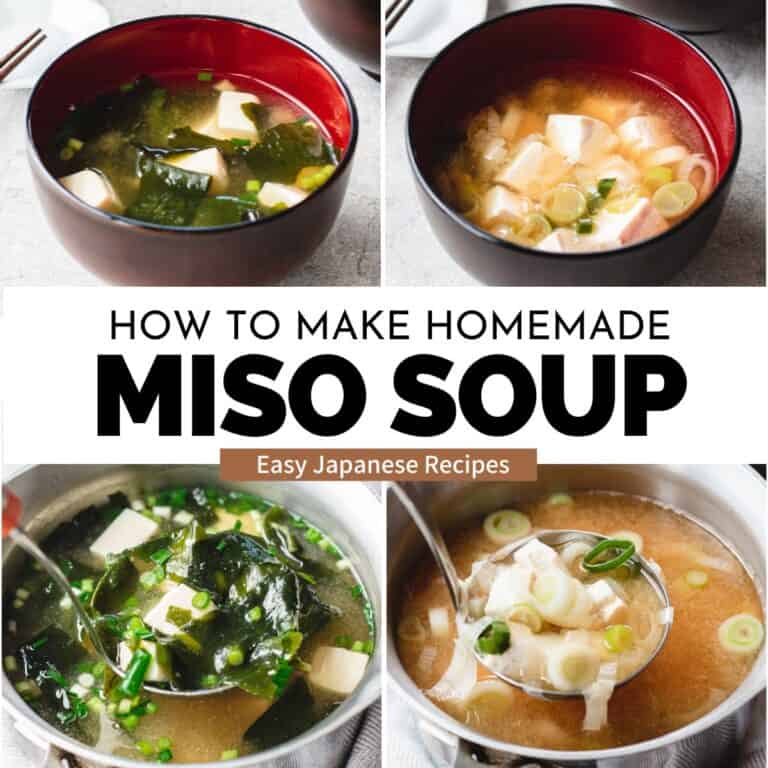
What to Serve With
Onigiri goes well with just about anything! This corn onigiri is served with stir-fried tofu and broccoli, pickled cucumbers, and a daikon salad with sesame dressing.

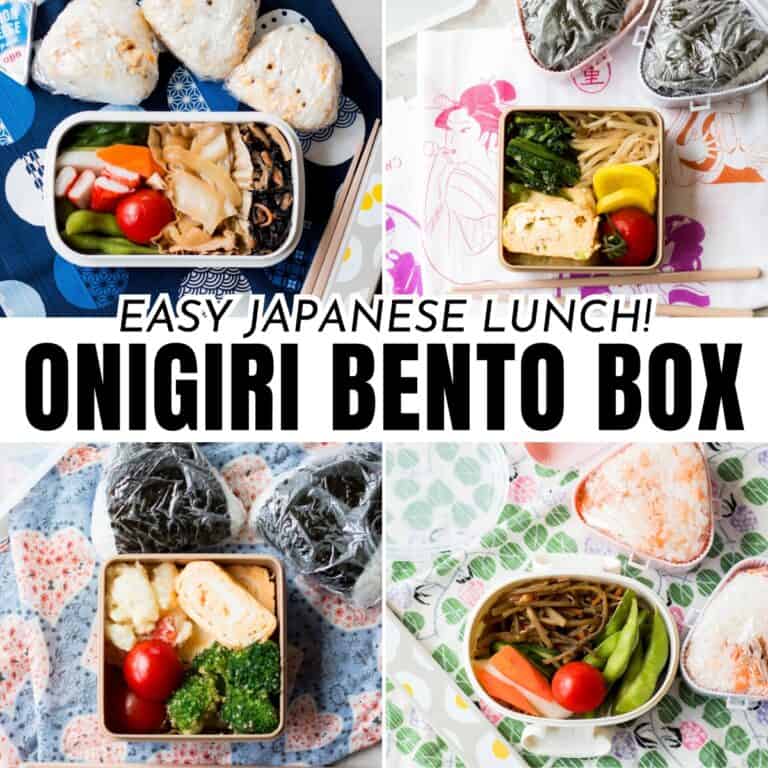
Onigiri: Perfect for Bento Lunch Boxes!
Here’s a picture of my children’s bento. They always love these rice balls! Check out more onigiri bento in this post!

Your Questions Answered
The popular fillings are salmon, tuna, umeboshi (pickled plum), katsuobushi (bonito flakes), tarako (cod roe), and kombu (seaweed). Since the rice is simple, so intensely flavored ingredients go very well.
A couple of days. But keep in mind that keeping onigiri in the fridge makes it dry, so better to heat it before eating.
Onigiri is often enjoyed on the go or while traveling, so it’s typically eaten cold or at room temperature. Many people even prefer it that way! But it all comes down to personal preference—if you like it warm, you can always reheat it in the microwave.
Yes! Just like a sandwich, you can grab onigiri and eat it with your hands. It’s a simple, fuss-free meal and perfect for eating on the go.
Warm rice is best for making onigiri. Cold rice is harder to shape and doesn’t stick well, causing the rice balls to fall apart when you eat them. Using warm rice helps create a firm yet fluffy texture.
The triangular shape of onigiri is inspired by mountains. In ancient Japan, people believed gods resided in the hills, so they shaped rice balls as offerings. While onigiri now comes in various shapes like round or cylindrical, the triangle remains the most popular.
Grab Your Onigiri Filling eBook!
Looking for more onigiri filling ideas? Check out our Onigiri eBook! From classics to creative options, all compiled conveniently in one place!

36 Delicious Ways to Enjoy Onigiri!
eBook: Onigiri
Explore new onigiri filling ideas with this comprehensive eBook!

More Onigiri Recipes You Will Love
Leave a Rating!
I hope you enjoy this recipe! Don’t forget to rate it and share your thoughts!
17 Easy Onigiri Recipes (No Nori Seaweed!)

Ingredients
Instructions
- Prepare Your Filling: Pick any filling from the list above and prepare it as noted.
- Mix with Rice: Add your filling to the cooked rice in a large bowl and gently mix to combine.
- Shape: Wet your hands with water, sprinkle salt on your palms, and rub together. Place one serving of rice in your hand and gently press with both palms to form a triangle, rolling it a few times to shape.
- Serve: Enjoy right away, or wrap it up to eat later.
Notes
- Storage: Wrap each onigiri in plastic wrap and place them in a container. They’ll keep in the fridge for a couple of days or in the freezer for up to one month.
- The filling amounts are just a guide—feel free to adjust based on your taste!
- If you’re in any of these situations, using plastic wrap can make things easier: When packing onigiri for a bento (lunch box), freezing the onigiri for later, when you are in a hurry, or when the rice is too hot to handle.
Video
Nutrition
This nutritional information is estimated and provided for general reference only.


That’s very helpful! thank you. I am learning to make Japanese foods. Credit to you.
You are very welcome, Susanna! That makes me happy!
Excellent, simple and easy to make!
Thank you, Jenny! I’m glad you like the recipe!
Lovely to look at, convenient and very tasty. Thank you for sharing these recipes! It helps me not miss Japan so much… 🙂
You are very welcome, Christine! I’m so happy to hear that!
My wife makes smaller sized onigiri without nori for our younger grandchildren with furikake or leftover salmon. The grandchildren call it “grandma’s special rice.”
Hi Rick! That’s perfect! Thanks for sharing and your onigiri story reminds me of my grandma’s, too! “grandma’s special rice” sounds so lovely 🙂