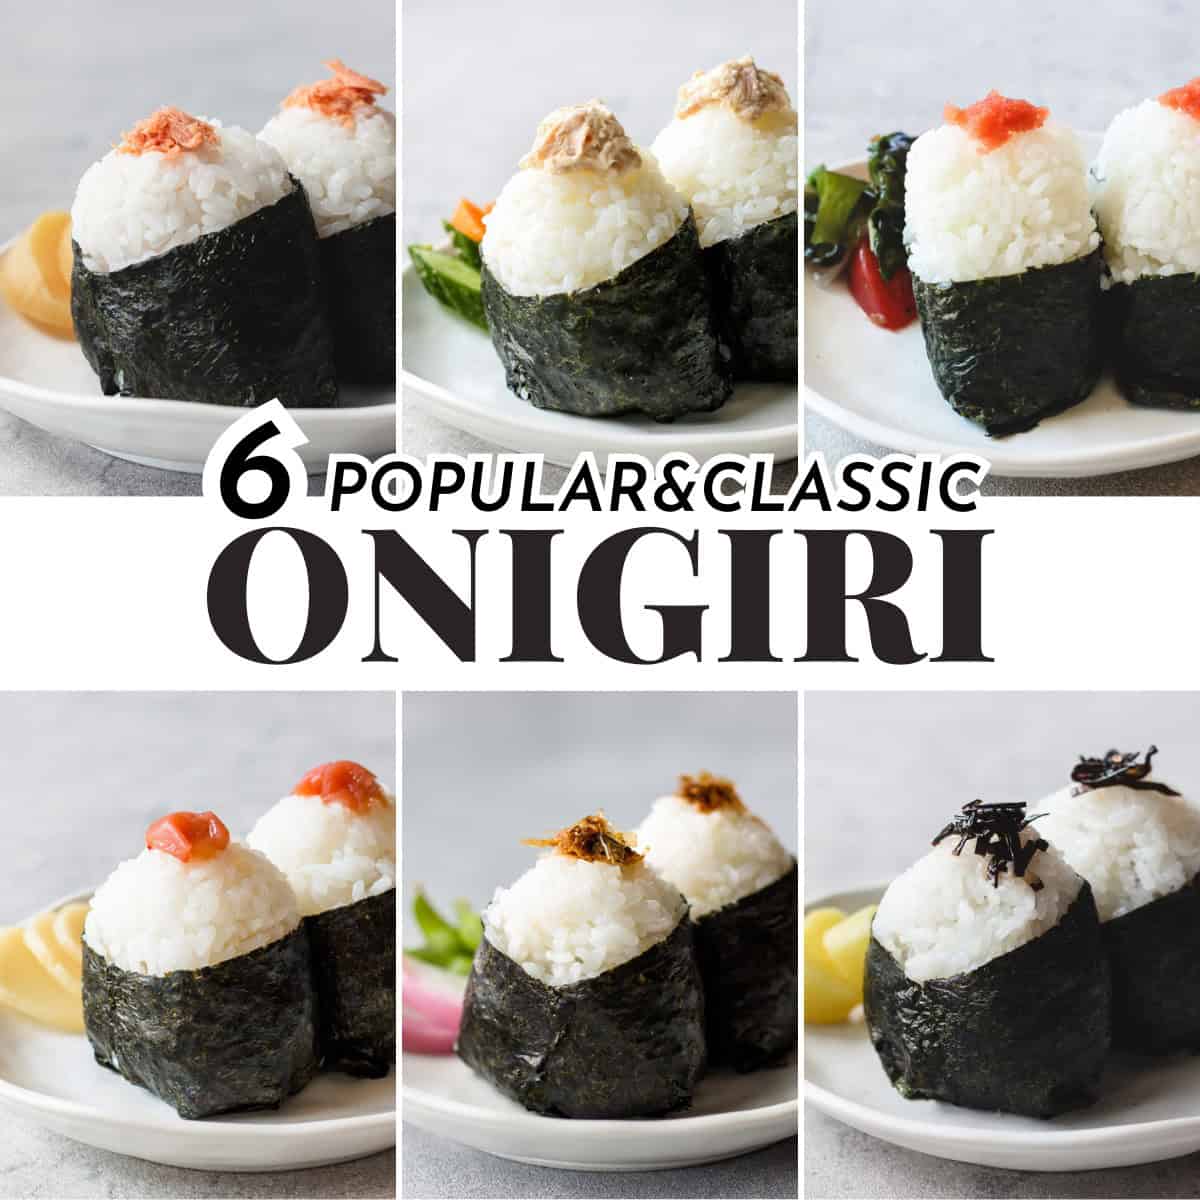
6 Popular Onigiri Recipes
If you’re not sure which onigiri filling to start with, here are six popular and classic onigiri recipes you can try today. Each one is simple, reliable, and great for everyday meals.
For onigiri basics, check out Onigiri 101 (Beginner’s Guide).

6 Popular Onigiri Fillings
I’ll introduce you to six popular and classic onigiri fillings and how to prepare them. These tasty variations are sure to satisfy your taste buds. Let’s go over each filling and find the perfect one for you to try!


Salmon
Salmon is a popular choice for onigiri. Its tender and flaky texture makes it a delightful filling. Grill a salmon fillet until it’s cooked through. Once cooled, break the salmon into flakes. For convenience, you can also use store-bought salmon flakes (picture above).

Tuna Mayo
Tuna mayo combines the rich, savory taste of tuna with the creamy texture of mayonnaise. Use water-packed canned tuna or oil-packed tuna. Drain the tuna and combine it with mayonnaise. For an authentic flavor, opt for a Japanese mayonnaise brand like Kewpie.

Umeboshi
Umeboshi, or pickled plum, is known for its unique salty and sour flavors. It pairs wonderfully with plain Japanese rice. Remove the seed from the umeboshi, and use it as it is or create a paste by chopping it with a knife.

Kombu Tsukudani
Kombu tsukudani is a flavorful side dish made from kombu seaweed. It’s often enjoyed as an accompaniment to rice. You can make it by simmering the kombu with sugar, mirin, and soy sauce until it becomes tender, or use store-bought kombu tsukudani (picture above) as your filling.

Katsuobushi
Katsuobushi, or Bonito flakes, add a delightful umami flavor to your onigiri. We also call it okaka. Add soy sauce to the katsuobushi and combine it to create the filling for your onigiri.

Tarako
Tarako, also known as salted cod roe, is prepared by marinating cod roe in a blend of salt, soy sauce, and other seasonings. The spicy tarako is called Mentaiko. Gently separate the tarako from its thin membrane or skin before using it as a filling.
Recipe Ingredients
You’ll need the following ingredients to make this recipe:

How To Make Onigiri: STEP BY STEP
Gather your ingredients, and let’s make a triangle onigiri! Follow the step-by-step guide, or watch the Onigiri 101 video in action.

Step 1
Prepare your filling. Here, we’re using grilled salmon.

Step 2
Put the rice in a small bowl and add the filling in the center.

Step 3
Form a triangle shape by pressing gently with both your hands.

Step 4
Wrap the triangular rice with nori.
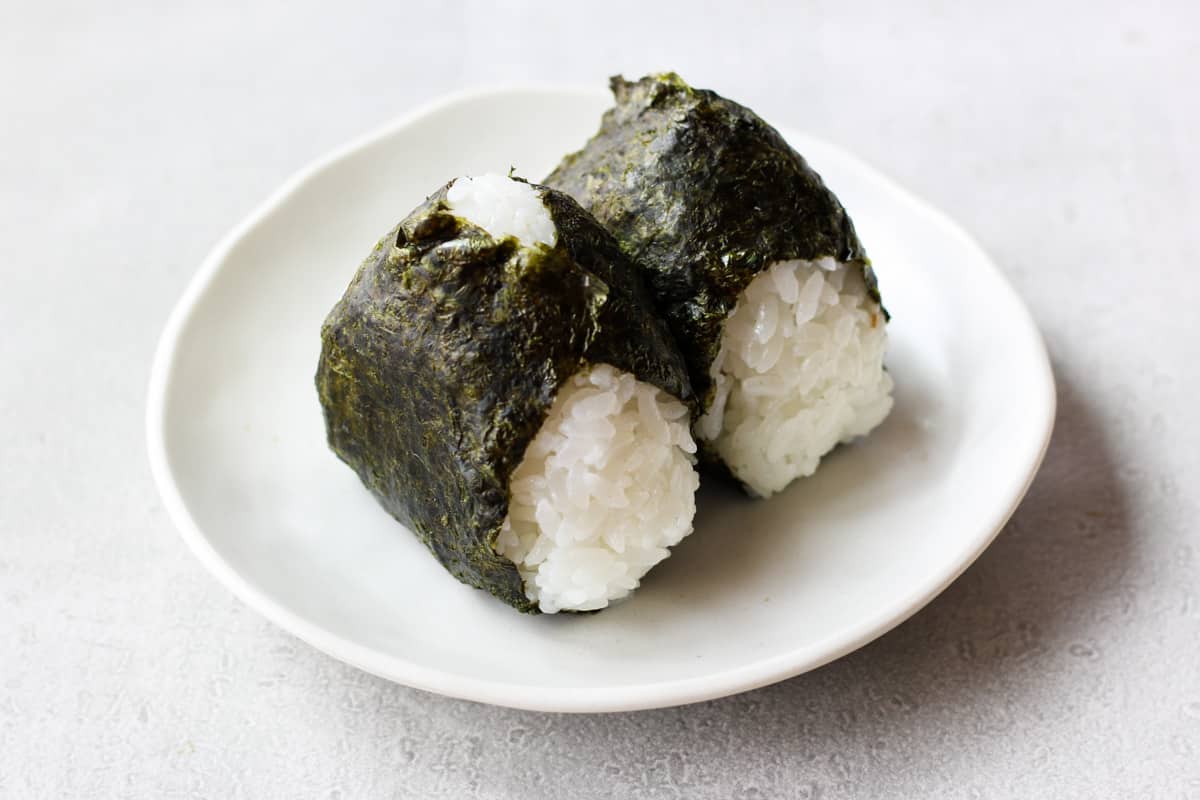
Here you go! Just grab it and enjoy! With your freshly made onigiri in hand, savor the flavors of Japan.
6 Onigiri Variations
Which one would you like to try? If you can’t pick one, then try them all!! The filling amount is up to you, so feel free to add as much or as little as you prefer.

From the left:
I added two teaspoons of each filling, so it’s full!
What To Serve With

To complete a meal, serve it with various dishes, such as tamagoyaki, napa cabbage coleslaw, and daikon miso soup.
Storage
Onigiri is best when freshly made, but if you need to store them for later, follow these guidelines:


Our three-year-old girl (now 5 years old!) enjoys her katsuobushi onigiri!!
Your Questions Answered
Common fillings are fish, fish eggs, pickled vegetables, and seaweed. Since the rice has a mild flavor, intensely flavorful fillings are often added.
It’s fine either way. It depends on your personal preference. Since onigiri is often eaten on the go, many people eat it at room temperature. However, people who live in cold climates like Hokkaido (the northern part of Japan) are more likely to warm onigiri up before eating it.
If you use long grains like Jasmine and Basmati, your onigiri would fall apart because they lack the right stickiness to hold the rice together. I recommend using Japanese rice, such as Koshihikari or sushi rice.
No. It’s not necessary. We use vinegar for making sushi, but not for onigiri.
Yes, you can make it without the filling. Some people prefer nothing in it, and it’s called Shio onigiri (shio means salt). It’s the simplest one made with salt, no filling, and no nori sheet!
Grab Your Onigiri Filling eBook!
Looking for more onigiri filling ideas? Check out our Onigiri eBook! From classics to creative options, all compiled conveniently in one place!

36 Delicious Ways to Enjoy Onigiri!
eBook: Onigiri
Explore new onigiri filling ideas with this comprehensive eBook!

More Onigiri Recipes You Will Love
Leave a Rating!
I hope you enjoy this recipe! Don’t forget to rate it and share your thoughts!
6 Popular Onigiri Recipes
Ingredients
Instructions
- Nori sheet: Divide a Nori sheet into three equal pieces.
- Filling of your choice: Refer to the ingredients section for preparation details.
- Collect ingredients: Gather cooked Japanese rice, the nori sheets, the salmon, a bowl of water, and salt.
- Rice and filling: Fill a small bowl halfway with rice, create a small dent in the center, and add 1 or 2 teaspoons of your filling. Fill the rest of the bowl with more rice.
- Water and salt on your hands: Wet both hands with water, put some salt (2 fingertips of salt) on your palm and rub between your hands.
- Shape rice: Place the rice on your hand and hold it with both hands. Form a triangle shape by pressing gently with both your palms and fingers while rolling it several times.
- Wrap: Wrap the triangular rice with nori.
Notes
- Equipment: Small bowl.
- Storage: Wrap each one with plastic wrap, put it in a container, and keep them in the fridge for a couple of days and one month in the freezer.
- Japanese short-grain rice (starchy and sticky) is ideal for making onigiri. If you are new to cooking rice, see “How to cook Japanese rice on the stove.”
- The filling amount is up to you, so feel free to tweak it for your preference.
- The nutrition label is for salmon onigiri.
Video
Nutrition
This nutritional information is estimated and provided for general reference only.
Did You Make This Recipe?
Please leave a review!!


Juri Austin
Hi! I’m Juri, founder of Chef JA Cooks and the creator and photographer of this site. I’m here to guide you in authentic yet easy-to-follow Japanese recipes! Let’s explore the world of Japanese cuisine together!