17 Must-Try Onigiri Fillings (Classic & Unique Ideas!)
Wondering what to put in your rice balls? Here are 17 delicious onigiri filling ideas, from classic to creative, to make each bite more exciting! If you’re tired of the same fillings, try these new flavors to keep things fresh and so delicious!
For onigiri basics, check out Onigiri 101 (Beginner’s Guide).

The possibilities for onigiri fillings are endless! With so many options, I’ve handpicked the must-try ones for this collection.
They’re all family-friendly and perfect for a midday snack, breakfast, or lunch on the go. I hope you enjoy them as much as we do!
Featured Comment
From A. W.: “Thank you for all of the recommendations for fillings! I’m excited to add many of these to my regular rotation, as well as to give me a break from the same old stuff I’ve been doing for years!”
🍙 6 Popular Onigiri Fillings
Japan’s most popular Onigiri fillings are tuna, salmon, umeboshi, tarako, katsuobushi, and kombu. If you go to a Konbini (a Japanese convenience store such as FamilyMart and Lawson), you can easily find them.

1. Tuna and Mayonnaise
Tuna mayo is the number one most popular onigiri filling in Japan! This classic combo of creamy tuna and mayo is always a hit.

2. Grilled Salmon
Another popular one! Grilled salmon and Japanese rice make the perfect pair in this classic onigiri.

3. Umeboshi
Umeboshi onigiri is a simple, plant-based rice ball with tangy pickled plum. Its bold flavor pairs perfectly with plain rice.

4. Tarako
Tarako is salted cod roe, lightly seasoned with soy sauce and other flavors. It adds a savory, umami-packed punch to this simple and satisfying onigiri.

5. Katsuobushi
Katsuobushi is a quick and easy onigiri filling—just mix it with a splash of soy sauce for a simple yet flavorful bite.

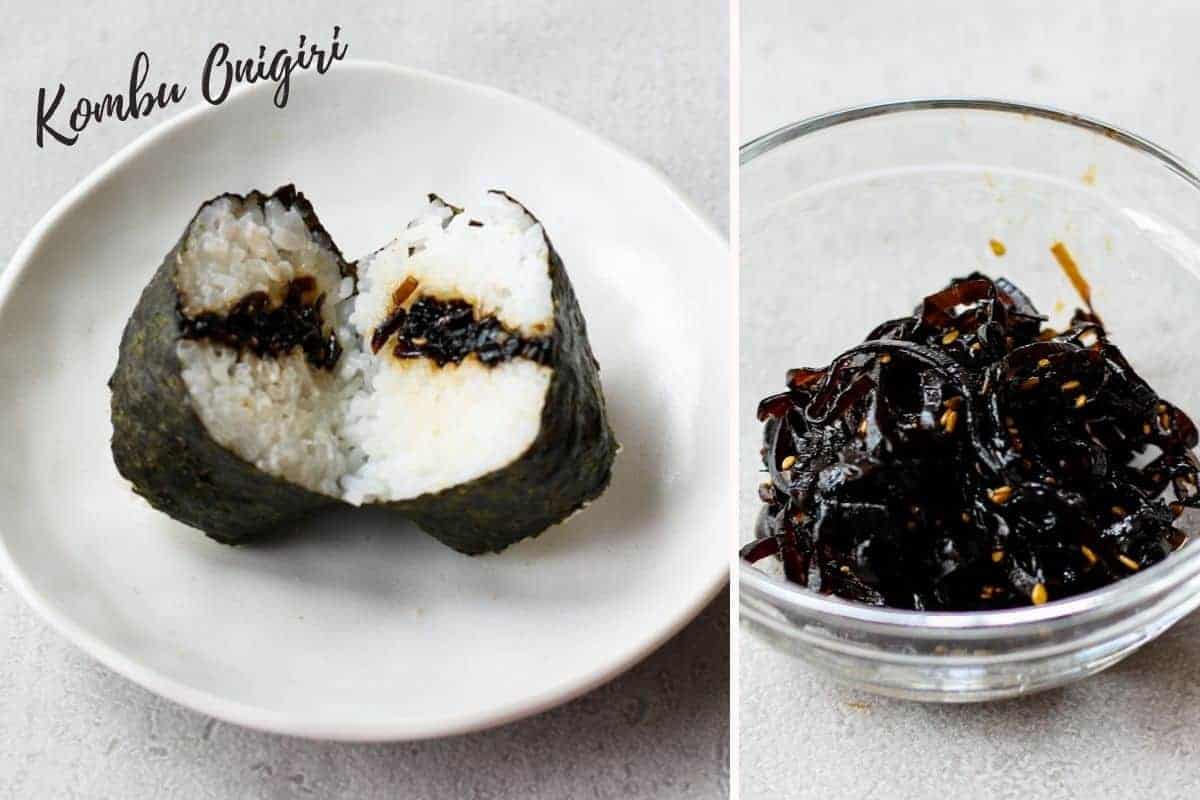
6. Kombu
If you love Japanese seaweed, this kombu onigiri is for you! Sweet and savory simmered kombu is a perfect match for plain, starchy Japanese rice. It’s also a great vegan filling!
7. Nitamago
Nitamago is a savory, marinated egg that makes for a delicious onigiri filling. This whole egg onigiri is sure to satisfy your hunger!

8. Cheese
Cheese in onigiri? Why not! Just pick your favorite cheese, add it into the rice, and your delicious cheese onigiri is ready to enjoy!

9. Kimchi and Mayo
Kimchi and rice are the perfect pair. The milder taste of mayonnaise makes it even better! If you love spicy food, I highly recommend this!

10. Takana-zuke
Takana-zuke is pickled Japanese mustard greens—crunchy and full of flavor! You can find it at most Japanese grocery stores, so give it a try!

11. Negi Miso
Negi miso is a blend of scallions and miso paste, with the rich miso pairing perfectly with Japanese rice. It’s super easy to make—just chop the scallions and mix them with the miso paste!

12. Takuan
Takuan is pickled daikon with a crunchy texture that’s irresistible. Just cut it into small pieces for a tasty onigiri filling!

13. Nori Tsukudani
Nori tsukudani is a traditional seaweed condiment simmered in soy sauce. Its rich, savory flavor makes for a perfect onigiri filling!

14. Tofu Crumbles
Tofu and soy sauce make a simple yet delicious onigiri filling. To prepare, stir-fry tofu with soy sauce and mirin until it’s lightly crispy. Check out the tofu scramble recipe for more details!

15. Cheese Yaki Onigiri
Yaki onigiri (grilled rice balls) is a popular choice! The aroma of sizzling rice and melting cheese will definitely make your mouth water!

16. Shio (Salt)
This onigiri has no filling—just shaped with a touch of salt for flavor. It’s a simple, yet delicious treat!

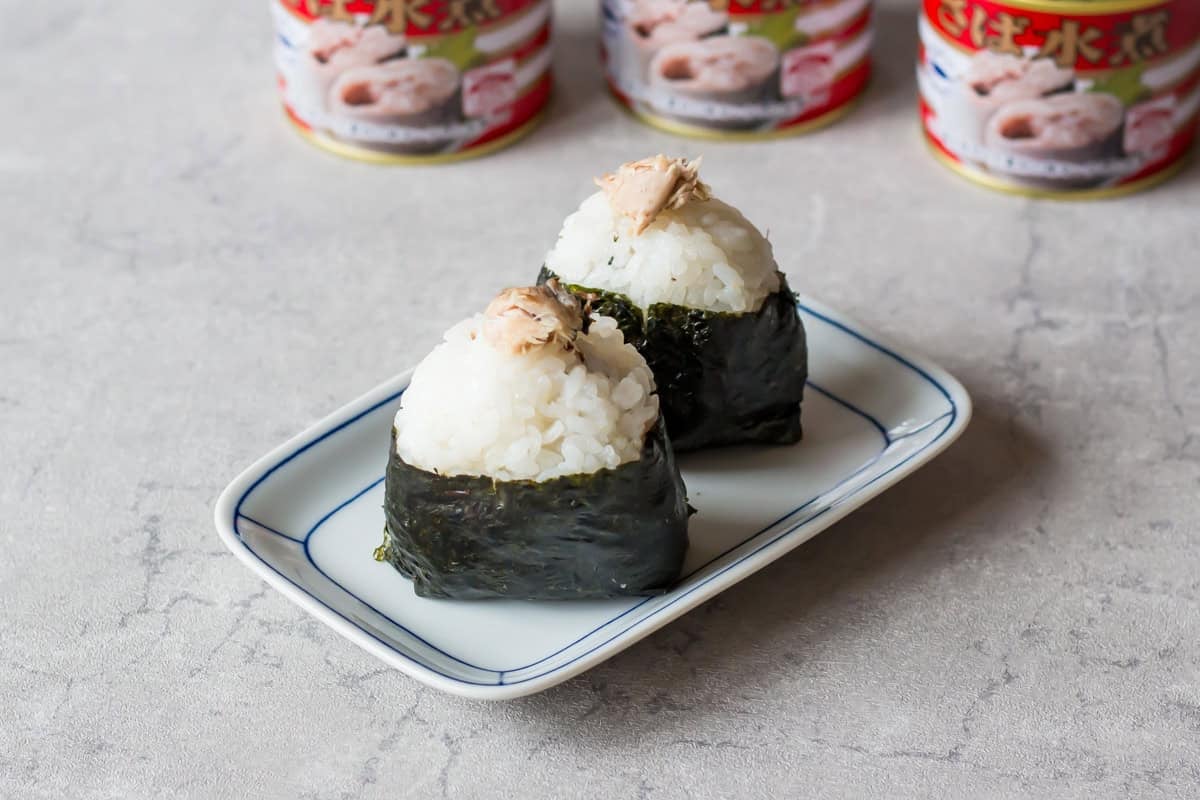
17. Saba Onigiri
If you enjoy fish onigiri, saba onigiri is a must-try. Made with canned mackerel, it’s easy to prepare and packed with flavor.
Which Filling Will You Try?
I hope you’ve found the onigiri filling you want to try! Which one are you most excited to try first? Let me know in the comments!

Grab Your Onigiri Filling eBook!
Looking for more onigiri filling ideas? Check out my Onigiri eBook! From classics to creative options, all compiled conveniently in one place!

36 Delicious Ways to Enjoy Onigiri!
eBook: Onigiri
Explore new onigiri filling ideas with this comprehensive eBook!

More Onigiri Recipes You Will Love
Leave a Rating!
I hope you find these onigiri filling ideas helpful! Don’t forget to leave a rating to share your thoughts!


kimchi mayo looks sooo good
they all look sooo good
I am going to try the marinaded egg it looks so good!!
I am definitely going to try the marinaded egg one it looks so yummy
Thanks for your comment, Sara! I hope you enjoy them!
Very hard to view your recipes because of all the ads. So it would be helpful to have a sheet with the fillings that we could print out. The ideas look great but I shall search for them elsewhere.
Thank you for your feedback, Heidi! I understand that the ads can be distracting, however, they do help to keep my blog going. I’ll soon offer a printable version of the Onigiri Fillings recipe. Stay tuned!
Hi so when I make the rice is it just plain cooked rice or do I make it with sushi rice seasoning. Thank you
Hi Andres! You use plain cooked rice for making onigiri!
Thank you for all of the recommendations for fillings! I make onigiri frequently, so running out of ideas was bound to happen at some point. I’m excited to add many of these to my regular rotation, as well as to give me a break from the same old stuff I’ve been doing for years!
You are very welcome, A.W.! I hope you enjoy these new onigiri ideas! I might add more later!