Rice Okonomiyaki

No ratings yet
Leave a Review!
15 minutes
Servings 2 servings
JUMP TO RECIPE & VIDEO

If you have leftover rice, try this rice okonomiyaki! This Japanese-style savory pancake uses cooked rice instead of batter. It’s simple to make, kid-friendly, and easy to customize. In this recipe, I’ll show you three tasty variations.

For more leftover rice ideas, try my Seafood and Lettuce Fried Rice or Zosui (rice soup)!

Rice okonomiyaki on a plate.

Okonomiyaki

Okonomiyaki is a Japanese savory cabbage pancake made with a batter of flour, dashi, eggs, cabbage, and various other ingredients like seafood, meat, or vegetables. It is a popular comfort food in Japan, enjoyed at home and in specialized restaurants.

Recipe Ingredients

You will need the following ingredients to make this rice okonomiyaki:

Save the Recipe via Email (Recipe Posts)

Save This Recipe!

Enter your email and I’ll send this recipe straight to your inbox! You’ll also get new, simple recipes every week!

Rice okonomiyaki ingredients.
  • Rice: Japanese short-grain rice works best because it is slightly sticky and helps the okonomiyaki hold together.
    I used leftover frozen rice that had been reheated, but freshly cooked rice works just as well.
  • Egg: The egg helps bind everything together.
  • Fillings: In this recipe, I include three filling options: shrimp (as shown above), natto, and vegetables. Choose the one you’d like to try, and see the Variations section below for more details.
  • Sauce & Mayonnaise: There is a special sauce made for okonomiyaki, but for rice okonomiyaki, I recommend savory, tangy Japanese tonkatsu sauce instead. It tastes great with a drizzle of mild Japanese mayonnaise.
  • Toppings: Katsuobushi (bonito flakes), aonori (dried seaweed), and furikake are optional, but they add extra flavor and an authentic Japanese touch.

How To Make Rice Okonomiyaki: STEP BY STEP 

Here’s a quick visual guide! Check the recipe card below for the video and full details!
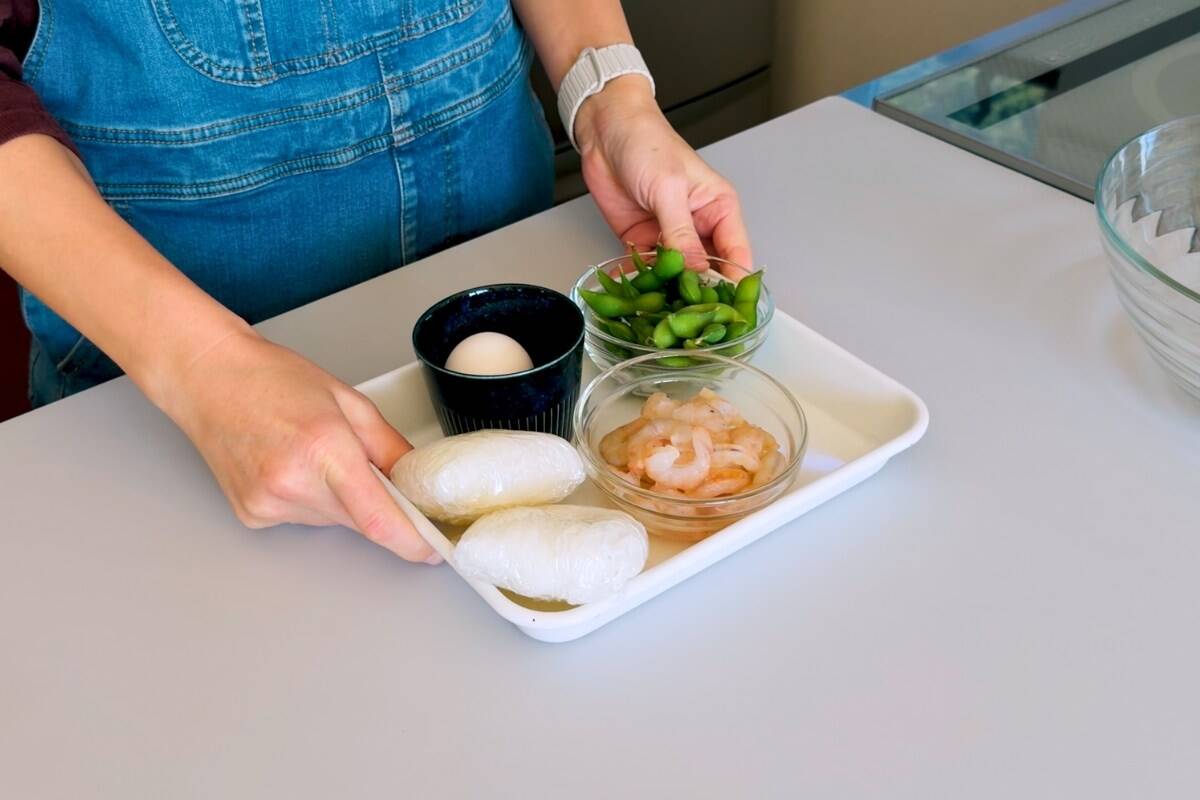
How to make rice okonomiyaki.

Step 1

Gather the ingredients.
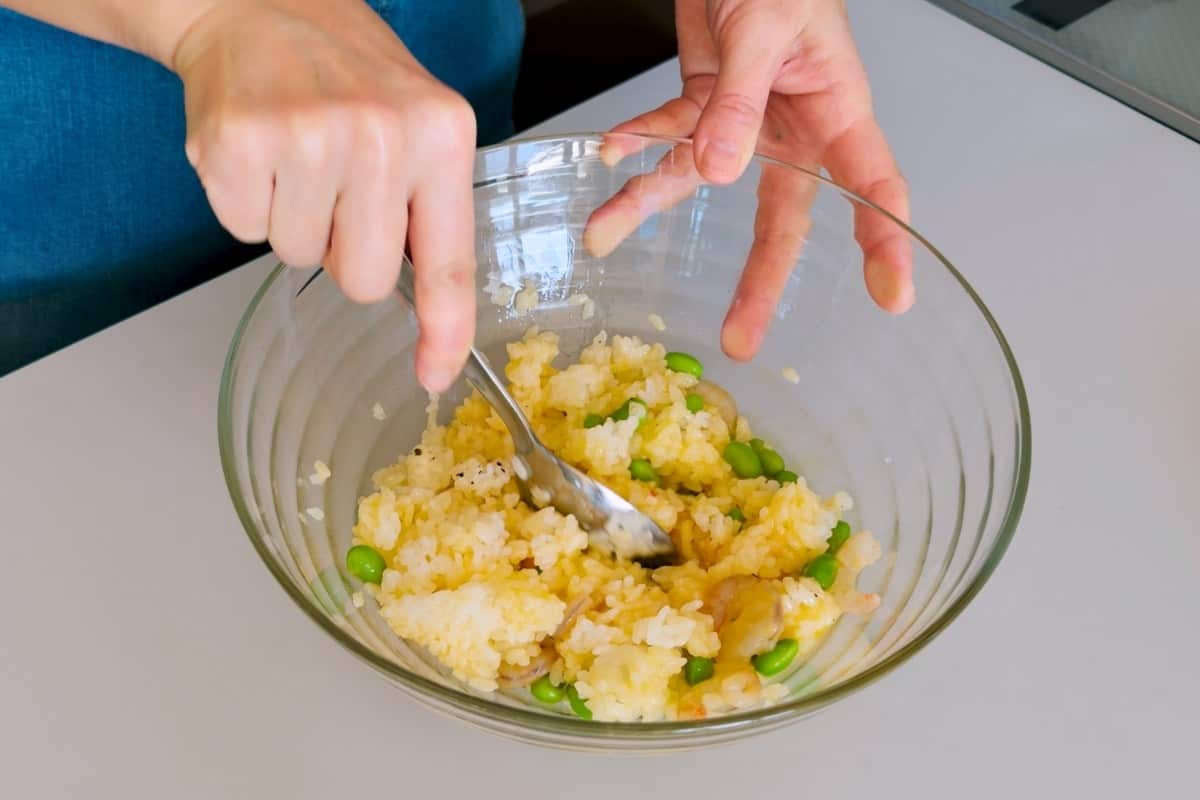
How to make rice okonomiyaki.

Step 2

Add the egg, warm rice, and your chosen filling (in this case, shrimp and edamame) to a bowl, and mix until well combined.
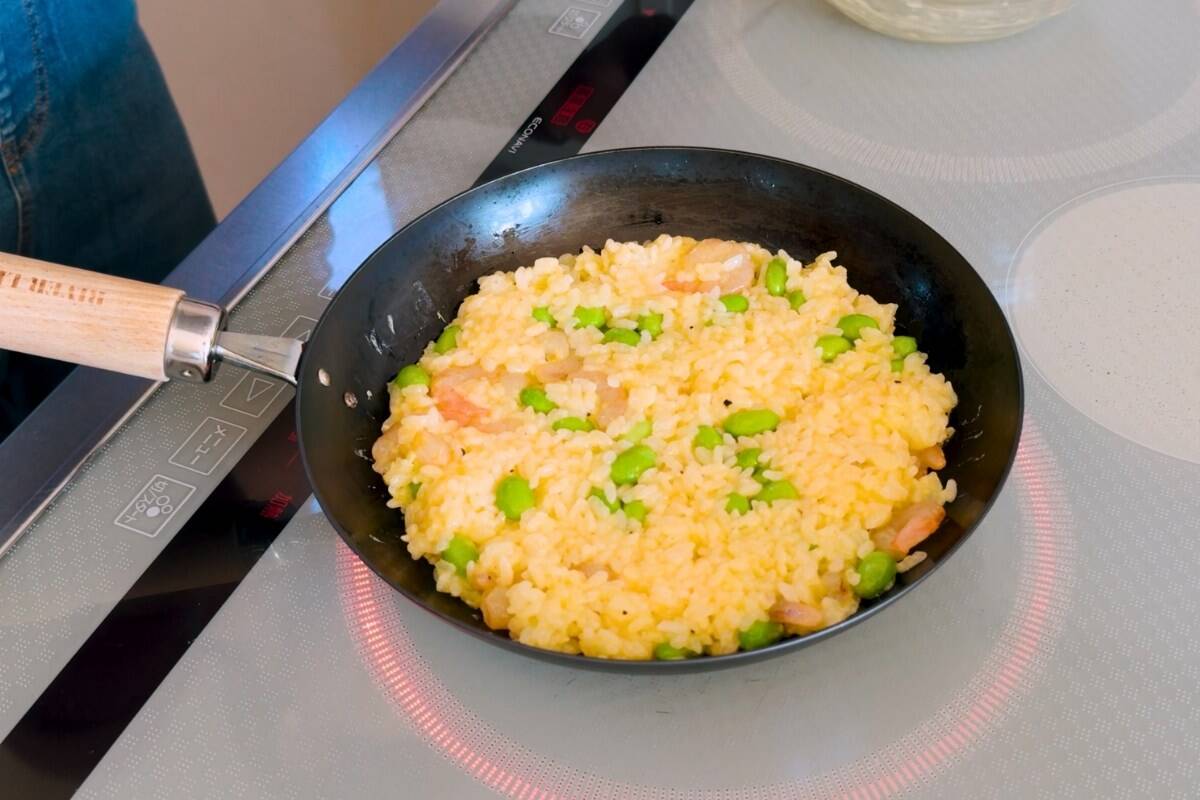
How to make rice okonomiyaki.

Step 3

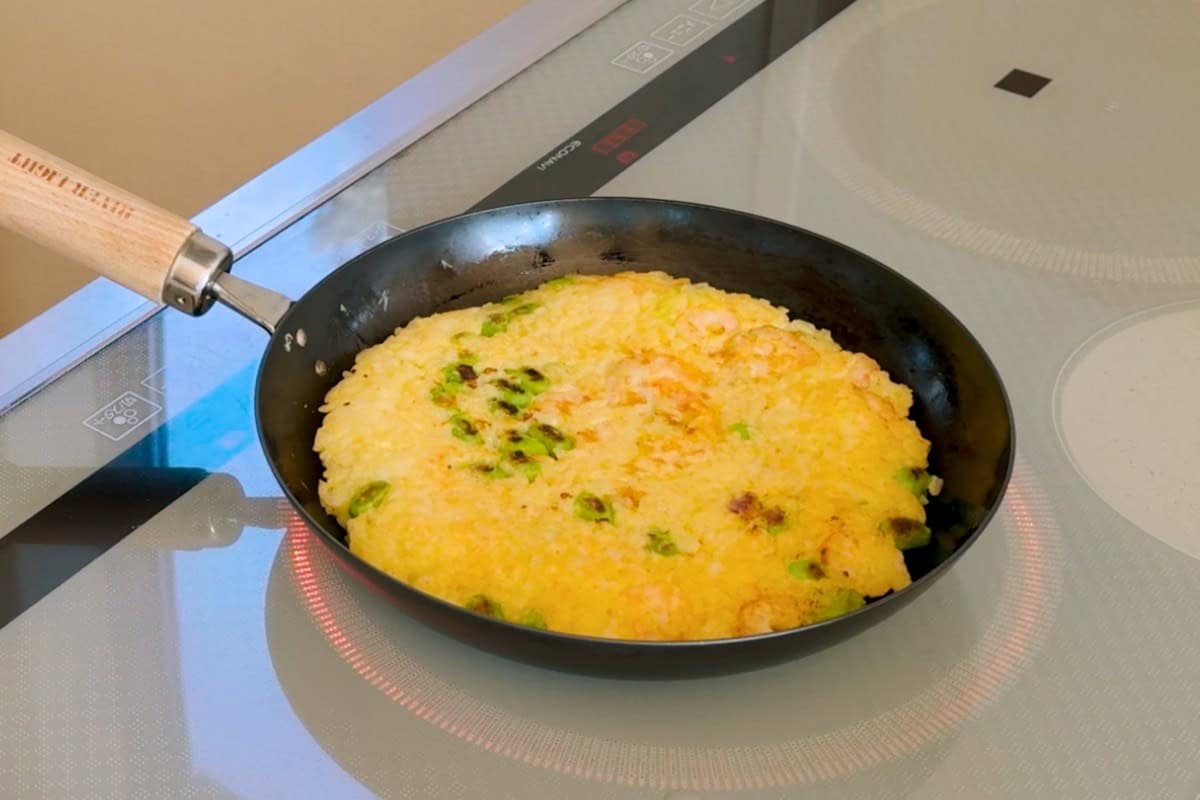
Heat oil in a frying pan, then add the rice mixture. Cover with a lid and cook until the bottom is lightly browned.
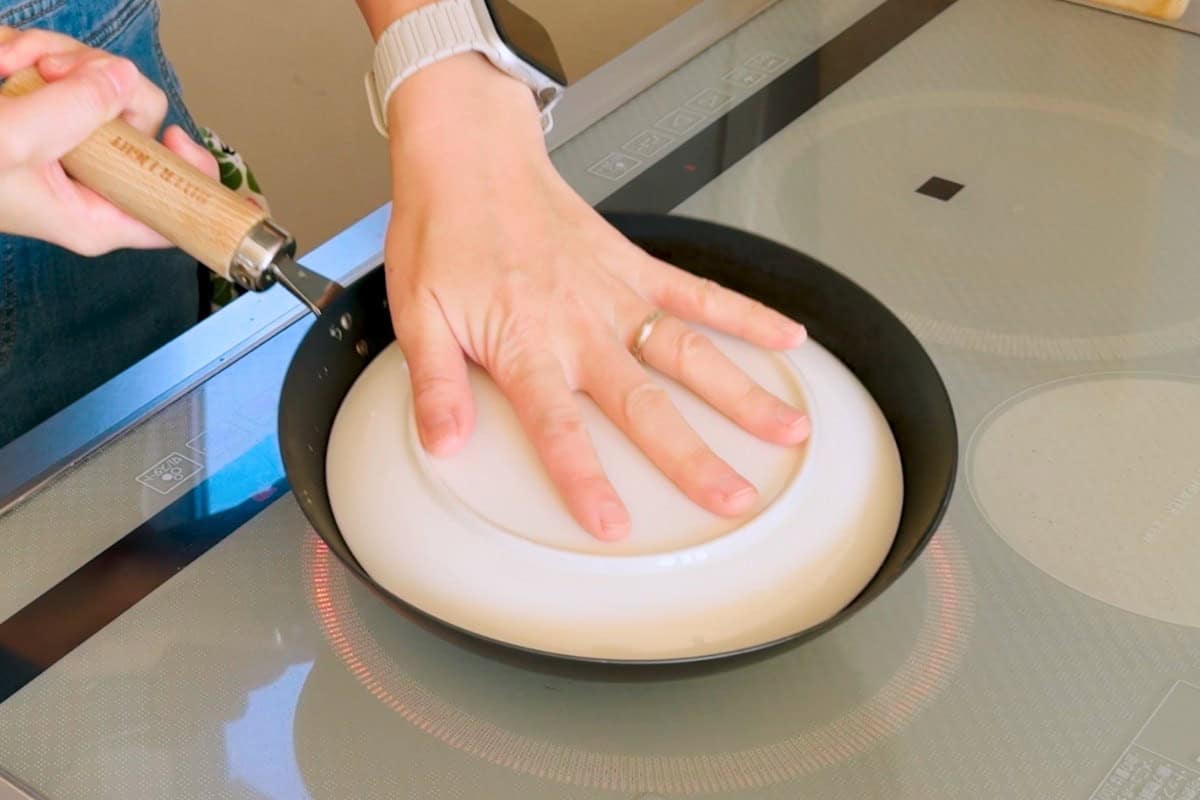
How to make rice okonomiyaki.

Step 4

Carefully flip the rice okonomiyaki and cook the other side.

How to make rice okonomiyaki.

Step 5

Cook until the bottom is lightly browned.

How to make rice okonomiyaki.

Step 6

Transfer to a plate. Drizzle with sauce and mayonnaise, and add toppings.
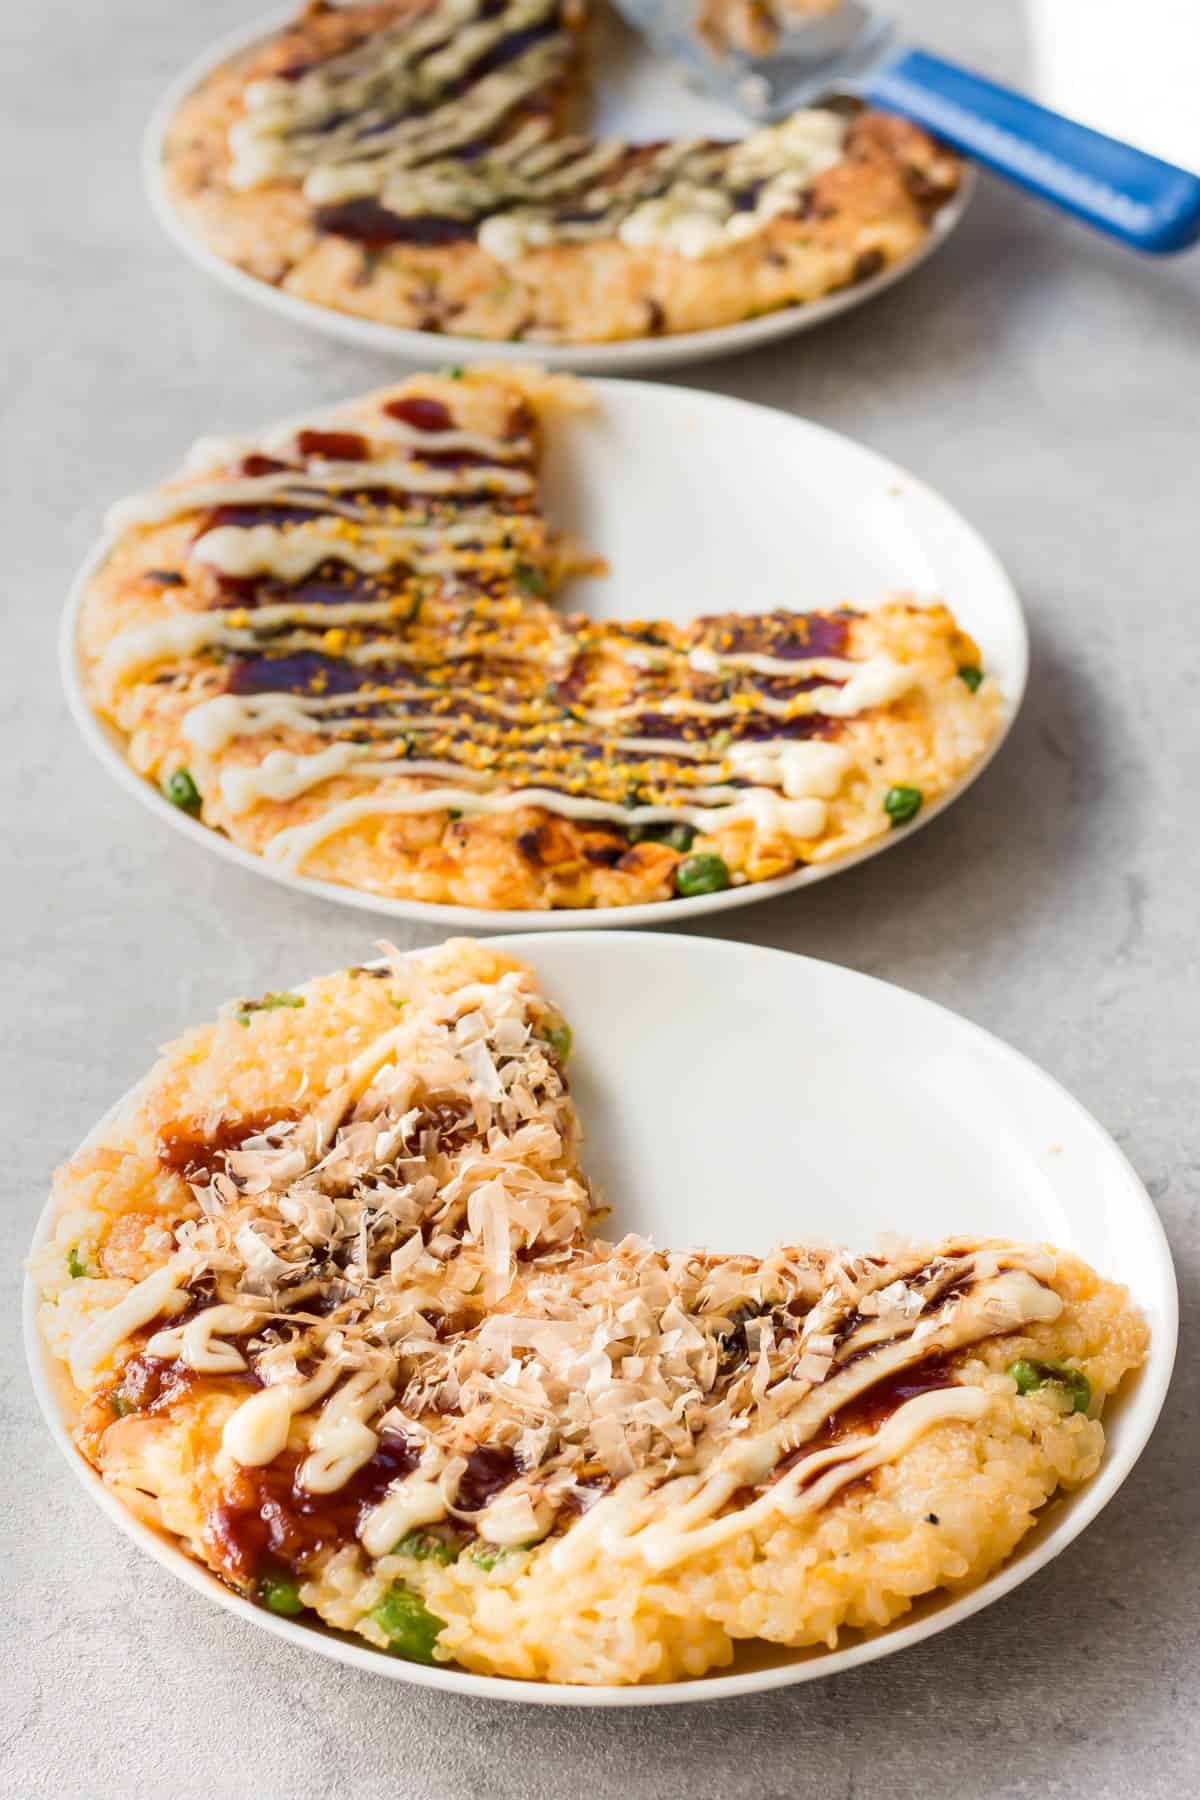
Recipe Tips

  • If using leftover rice, warm the rice before mixing. Cold rice doesn’t mix well with the egg and fillings.
  • If you have a nonstick frying pan, use it. If not, add a little extra oil to prevent the rice from sticking.
  • Crispy rice is the best part, so gently press the rice into an even layer. This helps it brown evenly and become lightly crispy.
  • For flipping, use a round plate instead of a spatula (see Step 4 above). It makes flipping easier and helps keep the rice okonomiyaki from breaking apart.

Variations

Here are three filling variations. All of these versions use the same rice base, so you can easily swap in your favorite filling.

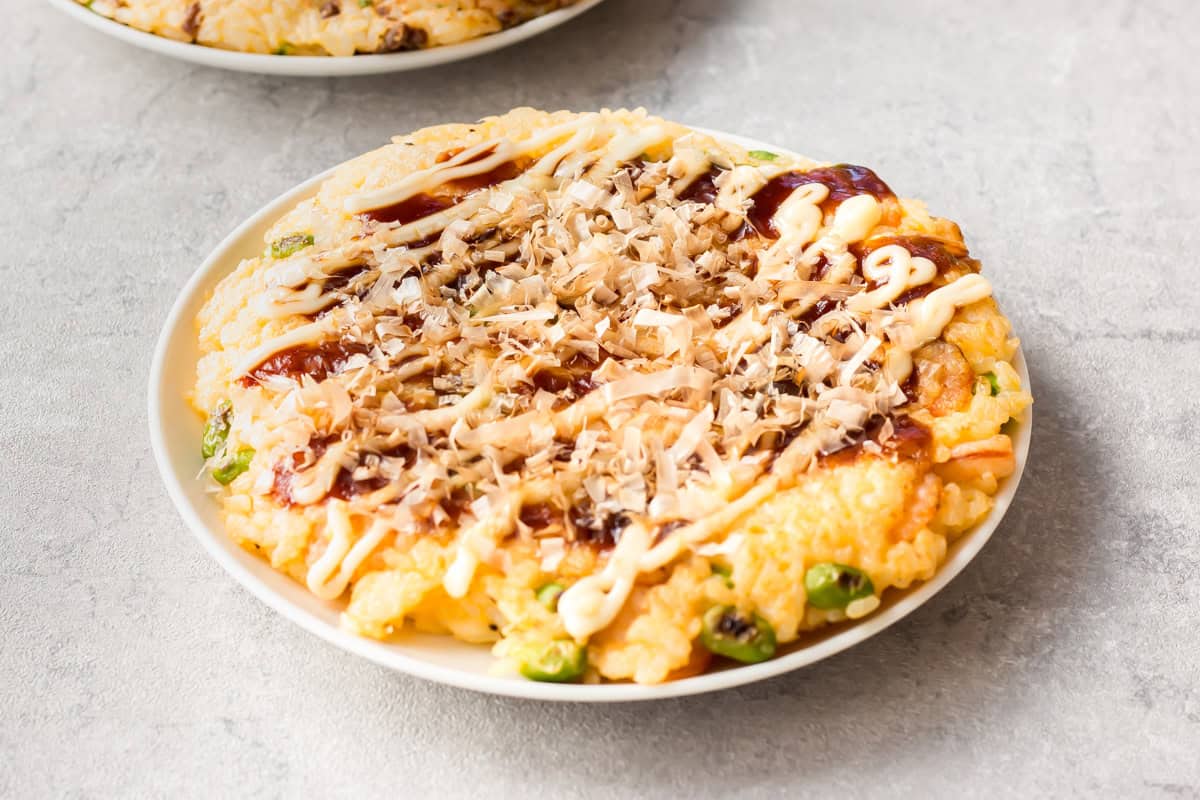
1. Shrimp Rice Okonomiyaki

This version uses frozen shrimp and edamame. I topped it with katsuobushi (bonito flakes) for a classic okonomiyaki finish.

Shrimp rice okonomiyaki on a plate.

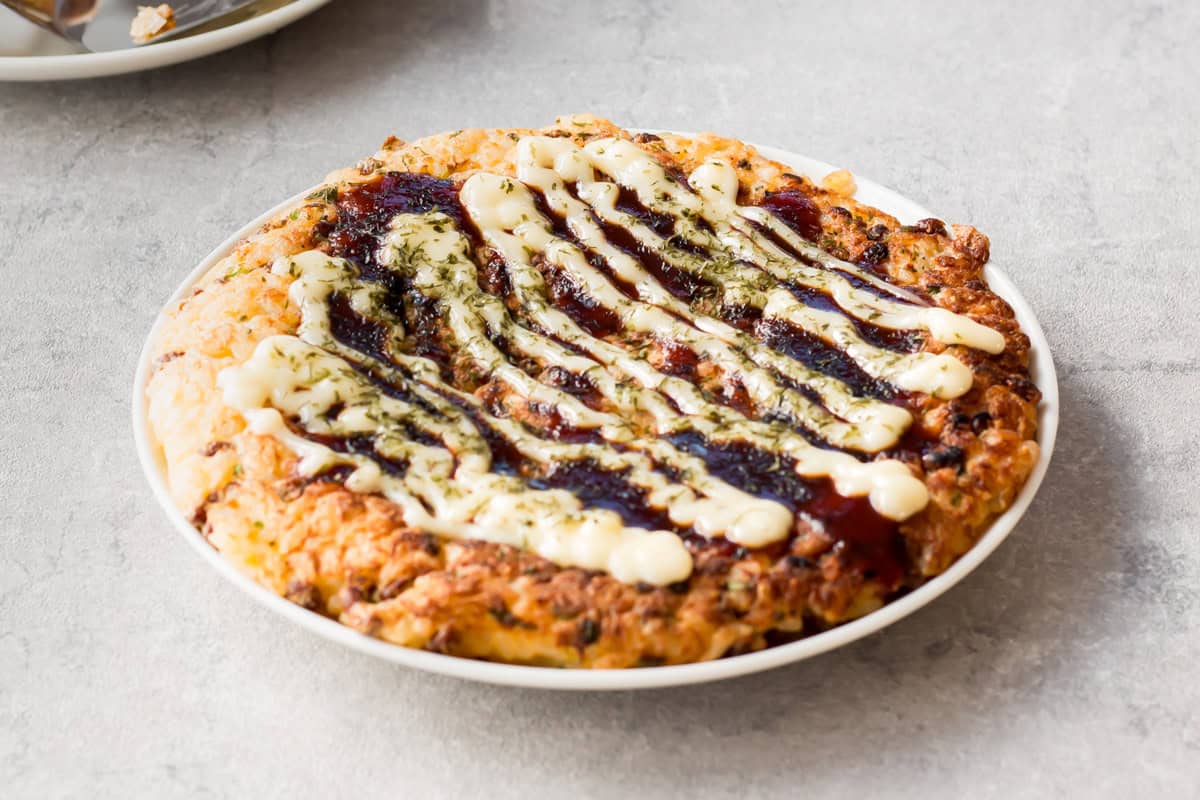
2. Natto Rice Okonomiyaki

If you love natto, this one is for you. Just mix the natto with its included sauce and chopped scallions, then fold it into the rice. A sprinkle of aonori (dried seaweed) makes a perfect topping.

Natto rice okonomiyaki on a plate.

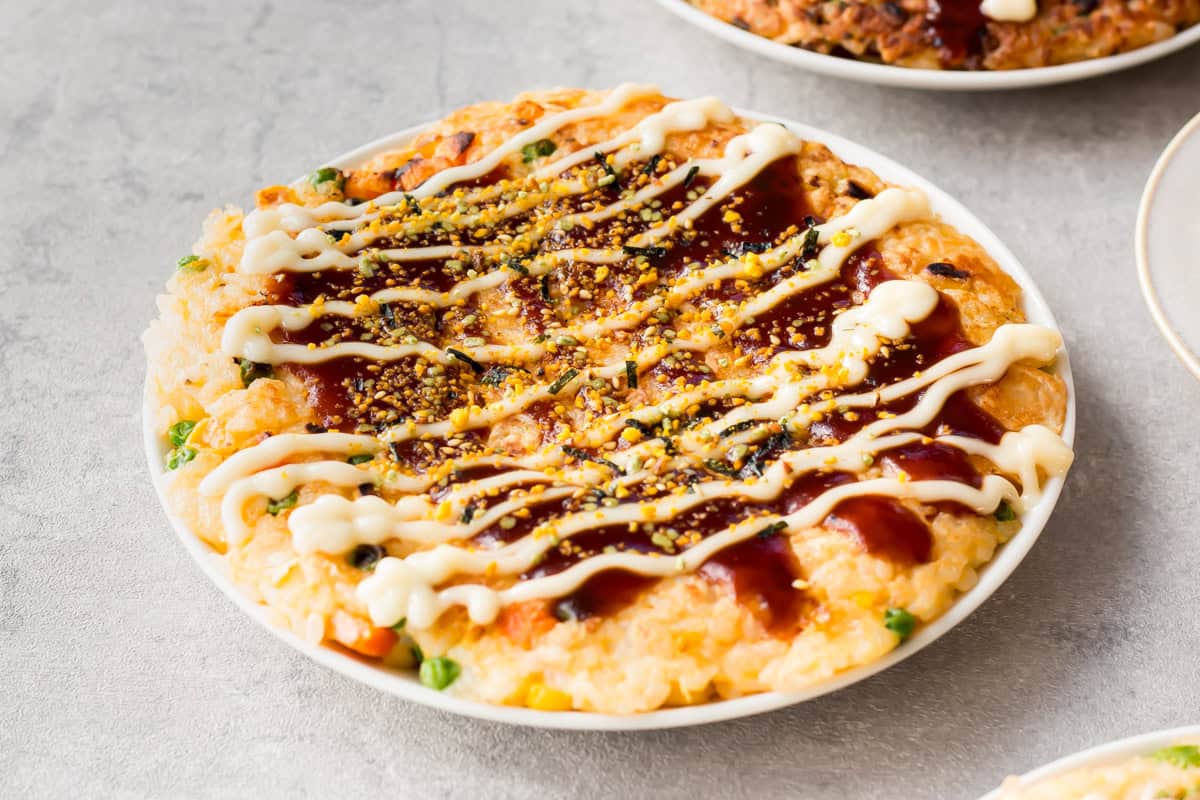
3. Vegetable Rice Okonomiyaki

This version combines frozen mixed vegetables with melty cheese for a cozy flavor. I used Camembert cheese, but feel free to use any cheese you like. I topped this one with furikake for extra flavor.

Vegetable rice okonomiyaki on a plate.

Enjoy one whole as a quick meal, or slice it up to share with family and friends!

Vegetarian ebook cover image.

Want more Japanese Plant-Based Ideas?

Get 10 Easy
Vegetarian recipes

Rice okonomiyaki on a plate.

More Rice Recipes You Will Love

Leave a Rating!

I hope you enjoy this recipe! Don’t forget to rate it and share your thoughts!

Rice Okonomiyaki

No ratings yet
Prep: 5 minutes
Cook: 10 minutes
Total: 15 minutes
Servings: 2 servings
Author: Juri Austin
If you have leftover rice, try this rice okonomiyaki! This Japanese-style savory pancake uses cooked rice instead of batter. It’s simple to make, kid-friendly, and easy to customize. In this recipe, I’ll show you three tasty variations.
Rice okonomiyaki on a plate.

Equipment

  • Medium flying pan

Ingredients
  

  • 1 egg
  • 2 servings cooked rice, about 230 g
  • 1 Tbsp vegetable oil
  • tonkatsu sauce
  • mayonnaise
  • katsuobushi, aonori, furikake, optional toppings
1. Shrimp
  • 1 cup frozen shrimp, thawed
  • ½ cup shelled edamame
  • salt and pepper, to taste
2. Natto
  • 1 pack natto, use the included sauce
  • 1 Tbsp chopped scallions
3. Vegetables
  • ½ cup frozen mixed vegetables, thawed
  • ½ cup cheese, cut into small cubes
  • salt and pepper, to taste

Instructions
 

  1. Make the rice mixture: Crack the egg into a bowl and whisk well. Add the warm rice and your chosen filling (shrimp, natto, or vegetables). Mix until everything is evenly combined.
  2. Heat the pan: Heat a frying pan over medium heat. Add the vegetable oil and spread it evenly.
  3. Cook the rice mixture: Add the rice mixture to the pan and gently press it into an even, flat round. Cover with a lid and cook on low heat for about 5 minutes, until the bottom becomes lightly browned and crispy.
  4. Flip and finish cooking: Carefully flip the rice okonomiyaki. Cook uncovered for another 2–3 minutes, until the second side is heated through.
  5. Serve: Transfer to a plate. Drizzle with tonkatsu sauce and mayonnaise, then sprinkle with toppings. Enjoy!

Notes

  • If using leftover rice, warm the rice before mixing. Cold rice doesn’t mix well with the egg and fillings.
  • If you have a nonstick frying pan, use it. If not, add a little extra oil to prevent the rice from sticking.
  • Crispy rice is the best part, so gently press the rice into an even layer. This helps it brown evenly and become lightly crispy.
  • For flipping, use a round plate instead of a spatula (see Step 4 above). It makes flipping easier and helps keep the rice okonomiyaki from breaking apart.
Save the Recipe via Email (Recipe Posts)

Save This Recipe!

Enter your email and I’ll send this recipe straight to your inbox! You’ll also get new, simple recipes every week!

Video

Nutrition

Serving: 1servingCalories: 373kcalCarbohydrates: 39gProtein: 33g

This nutritional information is estimated and provided for general reference only.

Course: Main
Cuisine: Japanese
Keyword: rice okonomiyaki

Did You Make This Recipe?

Please leave a review!!

Similar Posts

Juri Austin wearing denim kimono and holding bento box.

Juri Austin

Hi! I’m Juri, founder of Chef JA Cooks and the creator and photographer of this site. I’m here to guide you in authentic yet easy-to-follow Japanese recipes! Let’s explore the world of Japanese cuisine together!

Leave a Reply

Your email address will not be published. Required fields are marked *

Recipe Rating