Dashimaki Tamago
Dashimaki tamago is a savory Japanese rolled omelet made with dashi. Light, fluffy, and incredibly appetizing, it’s a delicious twist on classic tamagoyaki. If you enjoy tamagoyaki, you’ll likely enjoy this version as well.
Looking for more tamagoyaki recipes? Try my Nori Tamagoyaki or Tuna and Scallion Tamagoyaki!

Recipe Ingredients
You’ll need the following ingredients to make this dashimaki tamago:

How To Make Dashimaki Tamago: STEP BY STEP
Here’s a quick visual guide! Check the recipe card below for the video and full details!
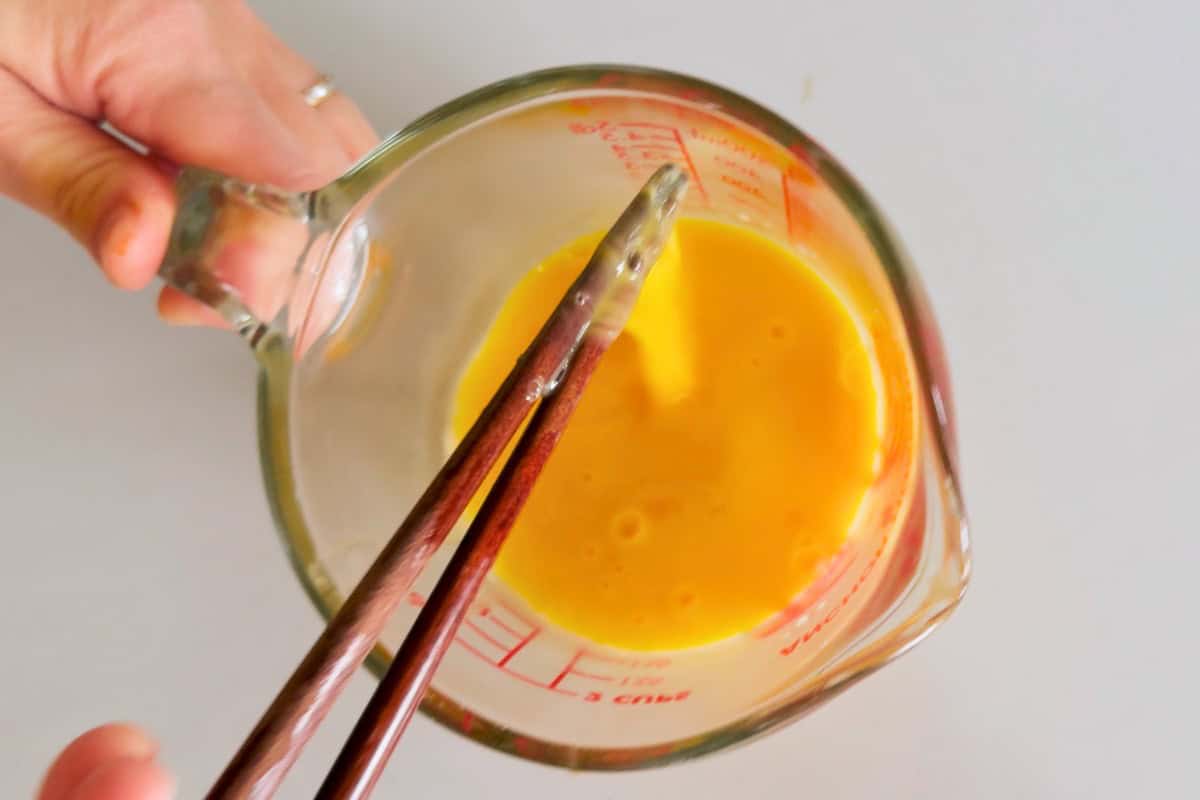
Step 1
Combine the eggs, dashi powder, soy sauce, and water to make the egg mixture.
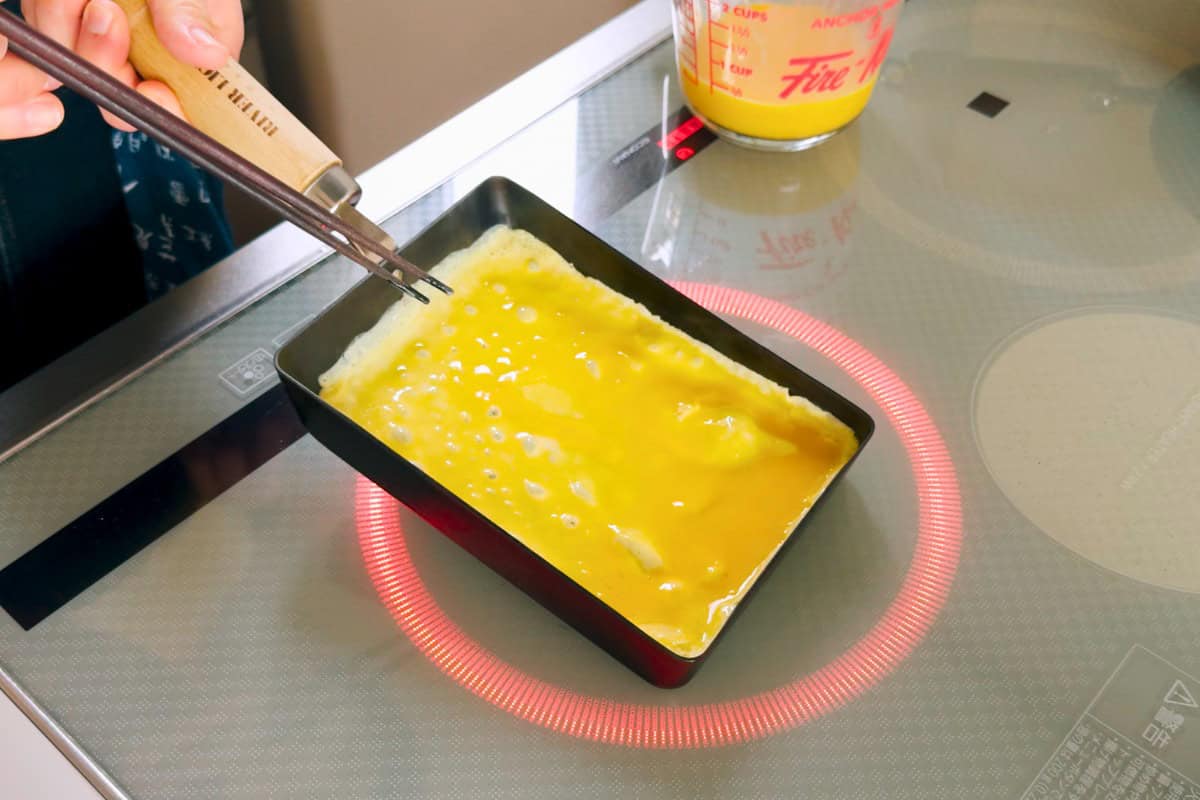
Step 2
Pour 1/3 of the egg mixture into the pan.
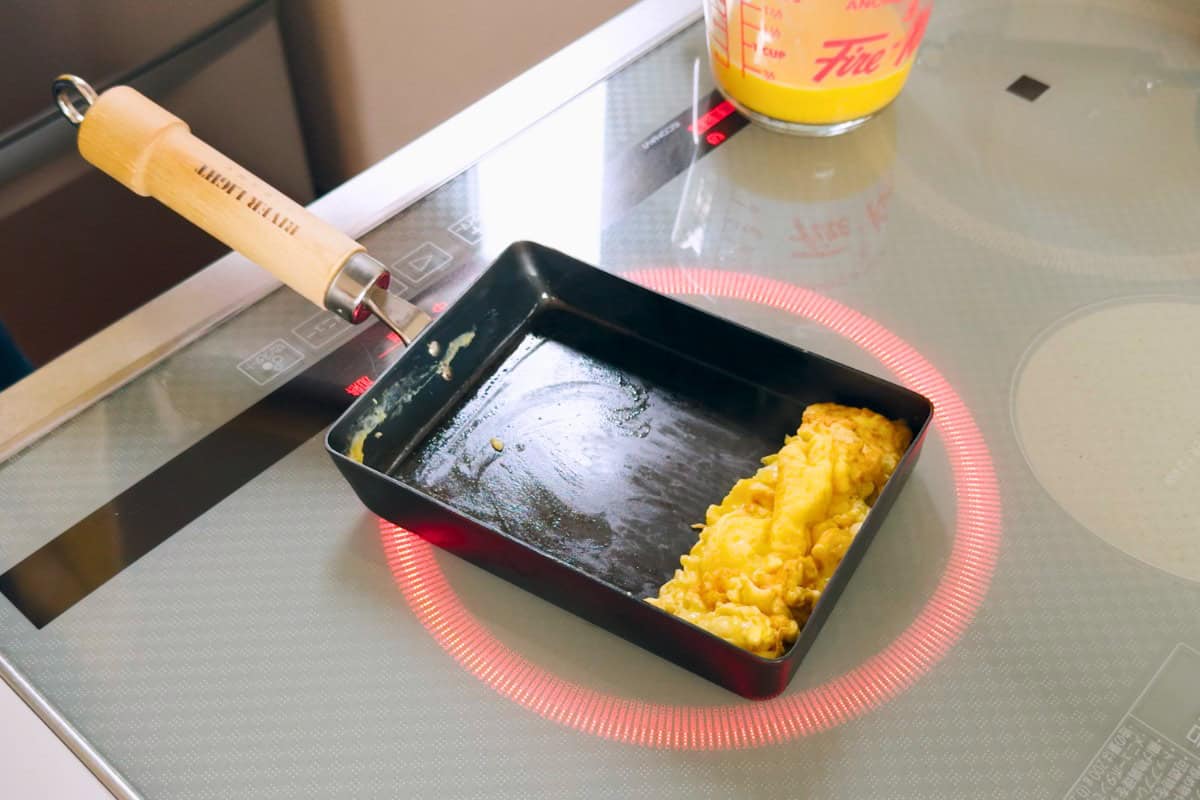
Step 3
When the egg is mostly set, gently roll it.

Step 4
Pour more egg mixture, lifting the rolled egg slightly so the mixture flows underneath.
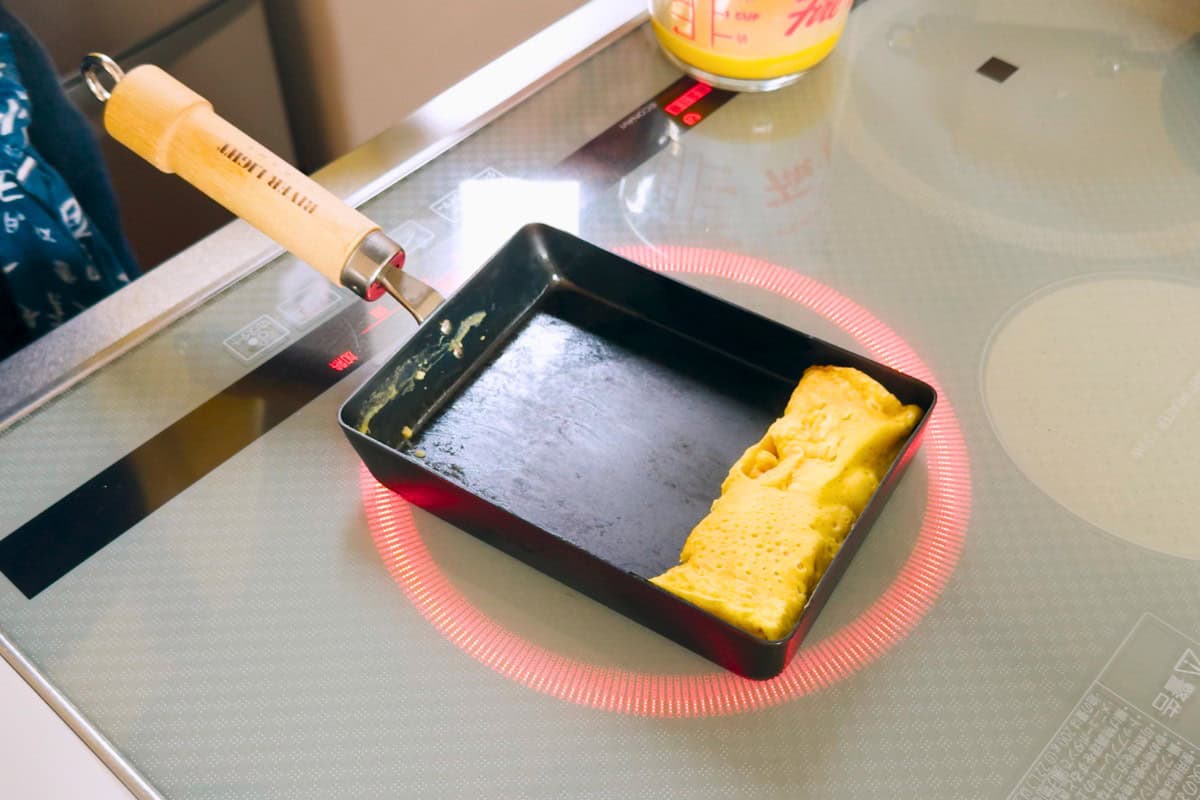
Step 5
Roll the egg again.
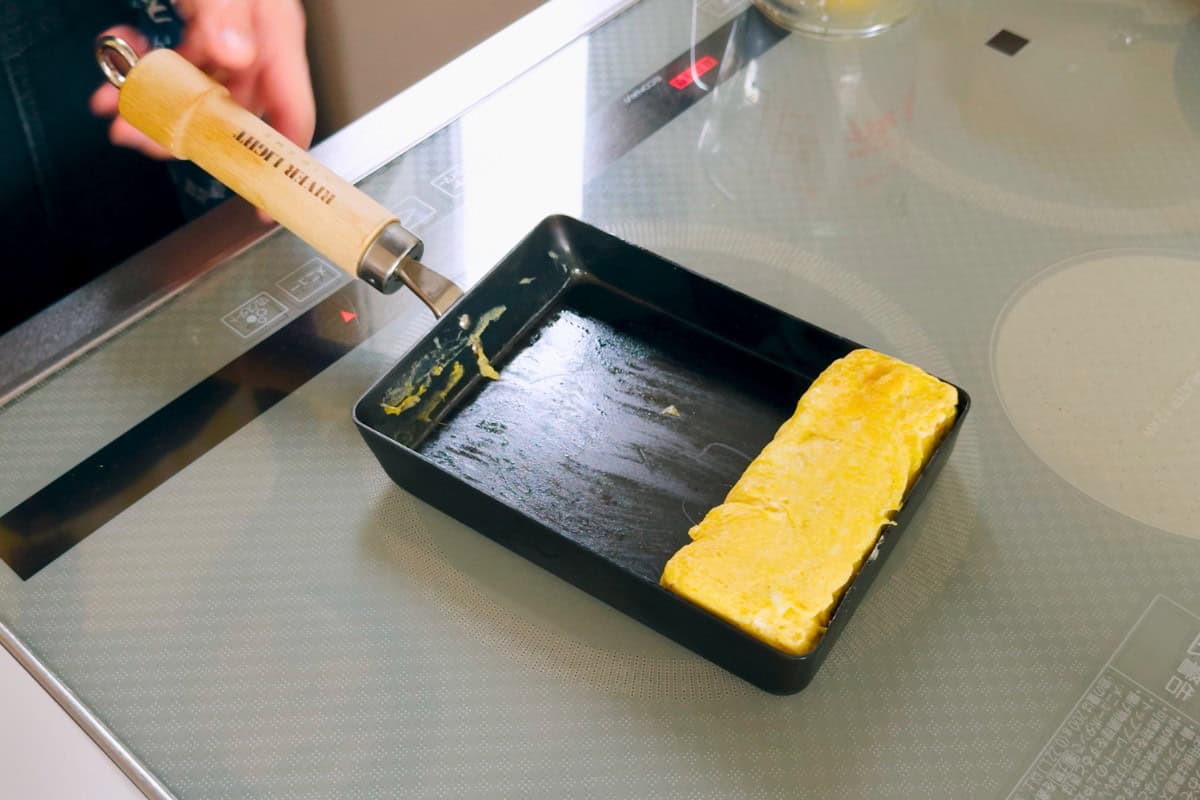
Step 6
Repeat the same process for the final roll.
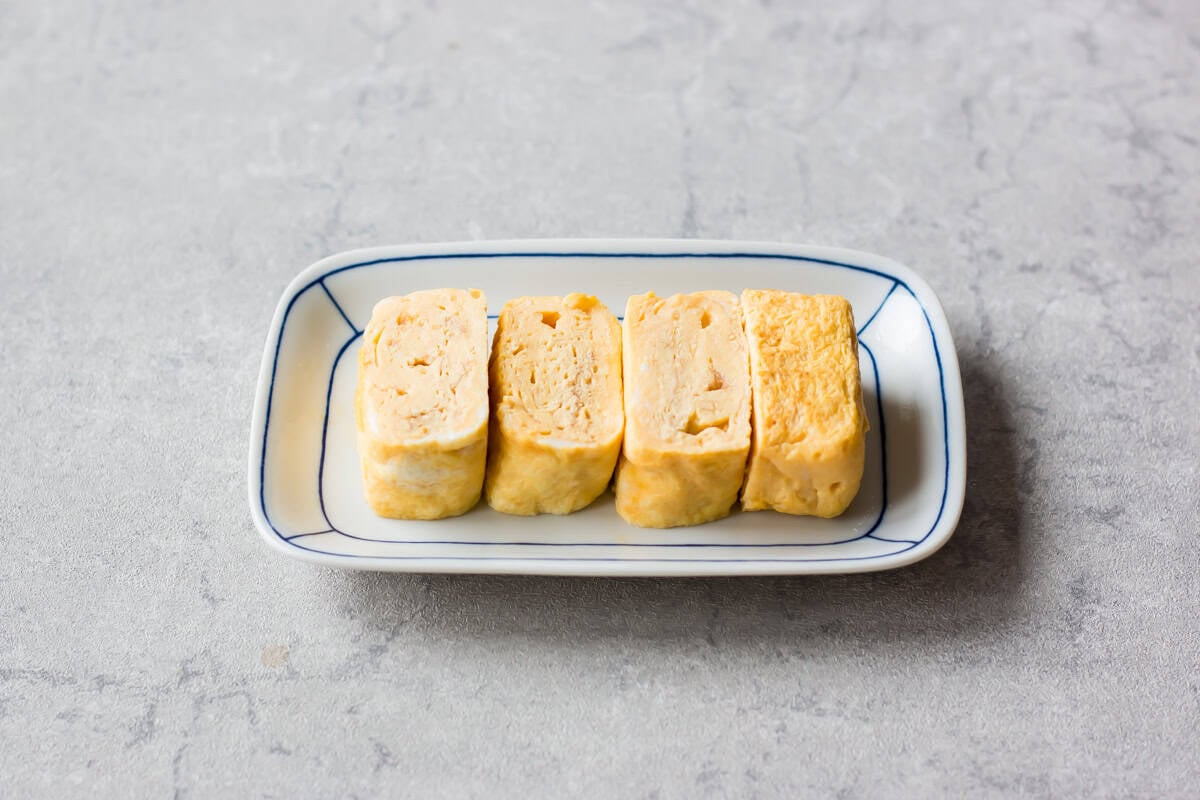
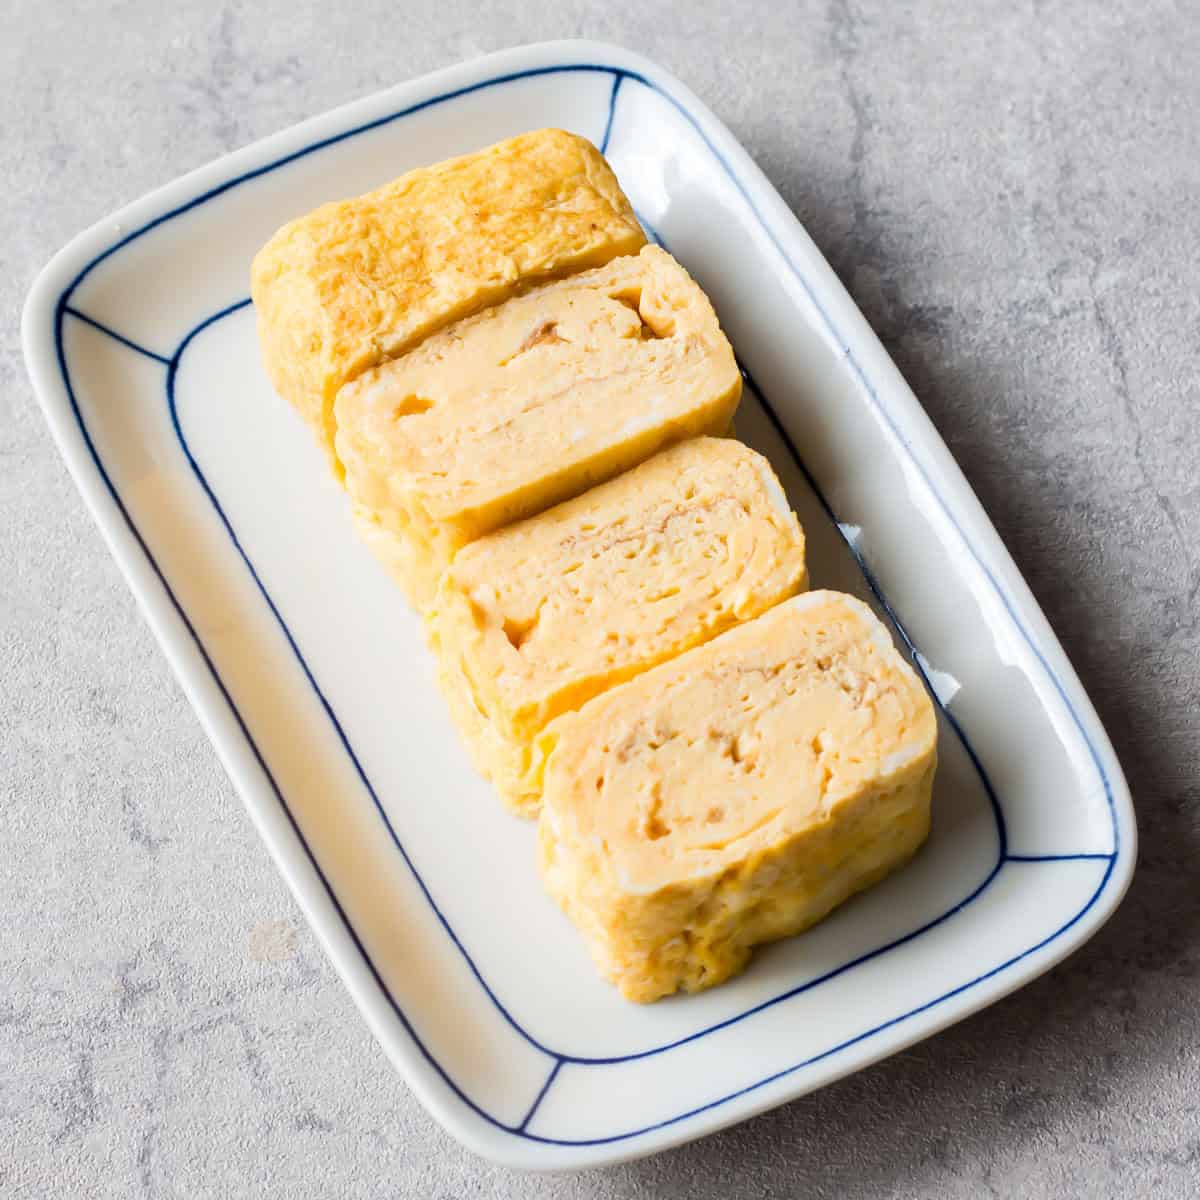
Your dashimaki tamago is done! If it loses its shape, place a paper towel over it and gently press to reshape while it’s still warm. Let it cool slightly before slicing, then enjoy!
How to Make Tamagoyaki in a Round Pan
Tamagoyaki is traditionally cooked in a rectangular pan, but it can be easily made using a small round frying pan as well.
When using a round pan, the edges of the egg will naturally turn out slightly curved. If you’d like a more rectangular shape, simply fold the left and right sides of the egg inward before you start rolling. This small adjustment helps create the classic tamagoyaki look even without a square pan.

Want more Japanese Plant-Based Ideas?
Get 10 Easy
Vegetarian recipes
More Japanese Egg Dishes You Will Love
Leave a Rating!
I hope you enjoy this recipe! Don’t forget to rate it and share your thoughts!
Dashimaki Tamago
Equipment
Ingredients
Instructions
- Make the Egg Mixture: In a bowl, beat the eggs. Add the dashi powder, soy sauce, and water. Mix well until fully combined.
- Heat the Pan: Lightly oil the pan and heat over medium heat. Tilt the pan to evenly coat the surface with oil.
- First Roll: Pour about one-third of the egg mixture into the pan. Spread it evenly. When the egg is mostly set but still slightly soft on top, gently roll it from the far edge toward you. Slide the rolled egg back to the far edge of the pan.
- Second Roll: Add a little more oil if needed. Pour half of the remaining egg mixture into the pan, lifting the rolled egg slightly so the mixture flows underneath. Once almost set, roll again and move the omelet back to the far edge.
- Final Roll: Pour the rest of the egg mixture into the pan and repeat the same process.
- Finish and Serve: Remove from the pan and let cool slightly. Slice into even pieces and serve. Enjoy!
Notes
- Storage: Store in the refrigerator for up to 3 days.
- Avoid overcooking, as this can make the eggs dry. It’s best to roll while the surface is still slightly soft.
Video
Nutrition
This nutritional information is estimated and provided for general reference only.


Juri, this is a wonderful and easy way to enjoy eggs. I make this often along with several of your recipes. I love how you explain everything. We lived on Okinawa years ago and your recipes remind me of our wonderful time there. Thank you so much!
Thank you so much for your comment! I’m really happy to hear that you enjoy the recipe and that it brings back memories of your time in Okinawa. That must have been a wonderful experience:)